This tutorial will take you through the steps of sewing the sleeve and attaching it to the armhole of the ZW Tier Dress.
To attach the sleeves it will require a mix of hand and machine sewing. This tutorial follows steps 5B-5D of the instruction booklet for the PDF Pattern.
STEP 5B
Sew together the front and back sleeve pieces (you will have 2 sets) with a single stitch and overlock the seams together. Press the seams to one side so you end up with a symmetrical pair.


Measure the total depth of your underarm and finished strap length on the bodice. This measurement will be the finished size of you sleeve head after you have gathered it in.

Gather the top curved sides of your sleeves. Do 2 rows of wide stitching, the second row finishing no more than 1cm away from the raw edge. Leave loose tails of thread on both ends of your sleeve and also at the centre point. Gather in evenly to the finished measurement of your armhole. Tie off all the tails securely.


Attach binding to the gathered in side of the sleeve. The binding should be around 4cm wide and out of a light weight fabric. Start by pinning the binding in place, stretching on very slightly for some tension. Once the binding is neatly pinned in place sew the binding on with the gathers facing up to make sure that the gathers are sewn neatly.


Press the binding then turn flip your piece so you are working from the right side of the fabric. You may need to trim away the seam with the gathers slightly so that it is not too wide (the seam should be around 5-8mm wide). Fold the binding down twice to cover the existing seam then pin in place and top stitch down.


STEP 5C
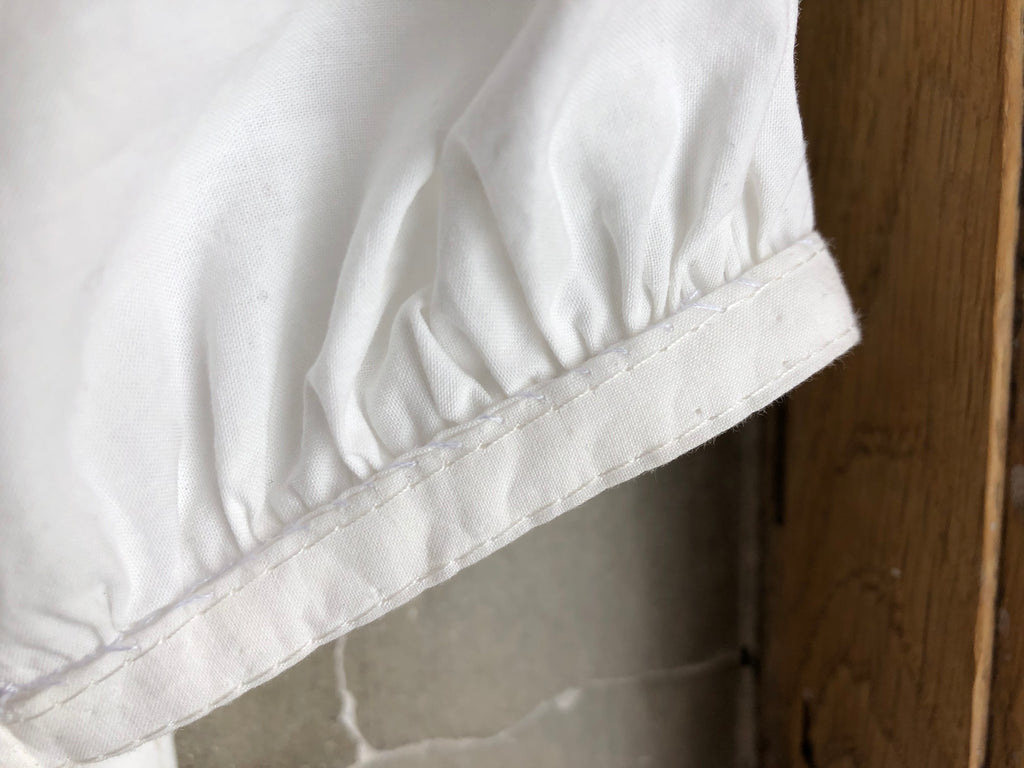
Sew the underarm seam of the sleeves with a single stitch and then overlock the seams together leaving a few centimetres extra overlocking hanging out on the bound side. Press the seams towards the back. Tuck the length of overlocking inside the seam then top stitch the seam down to hold in place neatly.


Press up the hem end of the sleeve 1cm into the wrong side of the fabric, then press up again 2cm all the way around. This will become the elastic casing. Top stitch the hem down leaving an opening close to the underarm of around 5cm.


Attach a safety pin to one end of the elastic then thread it through the casing. Once you have threaded through enough pin the other end of the elastic close to the opening so that it stays in place then continue threading the rest of the elastic all the way through. Finally join the 2 elastic ends together securely with a single stitch then top stitch down the opening.


STEP 5D
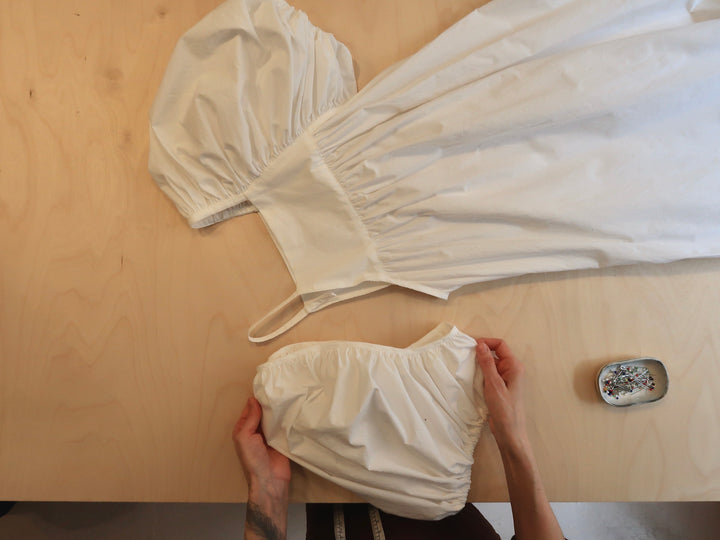
Pin the sleeves into the armholes matching up the underarm seams. The binding along the sleeve head should be on the inside of the garment and not visible from the outside.


Hand sew the sleeves to the underarms/straps. Working from the inside of the garment hand sew together the gathered side of the sleeve binding to the strap/underarm all the way around. Then hand sew together the other side, the other edge of the strap to the outer binding edge of the sleeve, continue down along the inside of the bodice and gently tack down along here as well, making sure that the hand stitching is not visible from the outside.