This tutorial compliments the ZW Tie Top pattern with colour images for each step. All garment views are explained in this tutorial so make sure you go to the relevant steps based on the garment view you are working with.
Good Luck!
1. DARTS
*All garment views*
Mark your darts according to the cutting steps. Sew darts on the wrong side then press down.


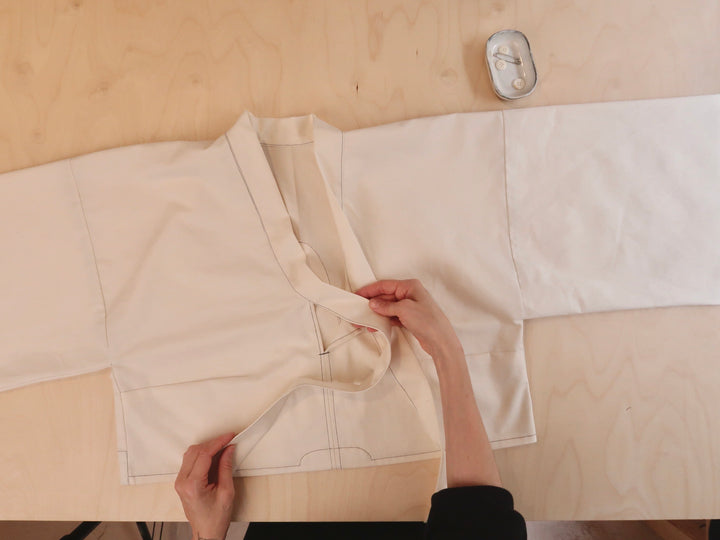
1. CENTRE FRONT / CENTRE BACK SEAM
*All garment views*
Garment view 1 has a centre front seam and garment views 2, 3 and 4 have a centre back seam. This tutorial shows the steps using garment view 1, but the technique is the same for all garment views.
For garment view 1 you should have a centre front notch measuring 7cm down from the top and for garment views 2, 3 and 4 you should have a centre back notch measuring 25cm down from the top. With right sides together sew from the notch down to the hem with a 1.5cm seam allowance. Press the seams open then press under a second time so that you have a small turn and turn edge. Top stitch this down close to the fold line on both sides continuing all the way from the hem to the very top edge of the neck. This stitch line should be visible from the right and wrong side of your garment. Working from the front of the garment stitch over the split point several times to strengthen this section.


3. SHOULDERS
*All Garment Views*
With right sides together place the front on top of the back and sew the shoulder then overlock together and press seams towards the back.


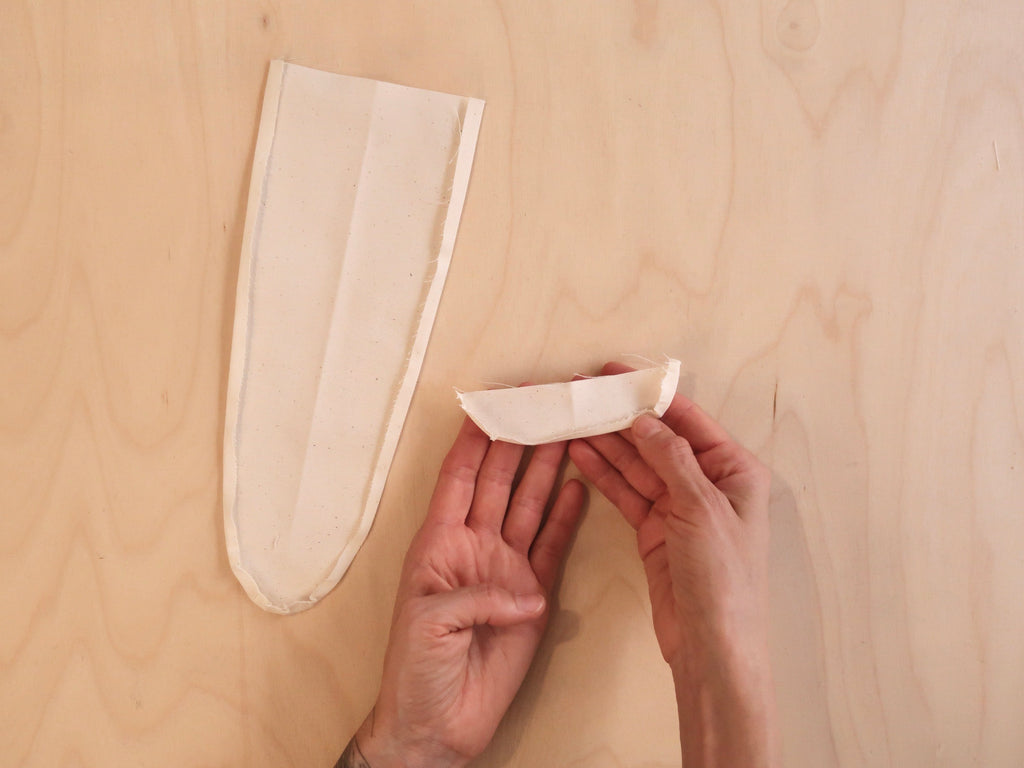
4. FACINGS
*All Garment Views*
Press the curved edges of the front and back hem facings approximately 8mm to the wrong side. Line up the centre front notch on the straight edge of the front facing and pin the centre front hem with right sides together. Stitch down with 1cm seam allowance and press the hem edge to the wrong side by 1cm all the way across. Repeat for the back hem facing.


*After this is complete continue directly onto the next steps as outlined below.
View 1 & 4: continue on to step 5a
View 2: continue on to step 5b
View 3: continue on to step 5c
5a. SIDE SEAMS & HEMS - VIEW 1 & 4 ONLY
Turn and press up the front hem another 1cm to the wrong side to make a small turn and turn hem. Pin the hem and facing in place and stitch the hem down following the curve of the facing at the centre front.
With right sides together sew the side seams together with 1cm seam allowance starting from the underarm notch and continuing down to the hem. Turn the back hem to the wrong side to cover the side seam, making sure the folded edge matches the finished edge of the front hem. Stitch down then overlock the side seams together, turn the back hem the right way and press to the back. Press the hem and back facing in place and stitch down following the curved edge of the facing at the centre back.


*After this step is complete go straight to step 6*
5b. SIDE SEAMS & HEMS - VIEW 2 ONLY
Measure down from the underarm notch 17cm and make a second notch (please note the garment in this photo is not to scale and has a slightly different measurement here as it is showing a shortened version of this top). With right sides together sew the side seams from the underarm to the second notch with a 1.5cm seam allowance.
Snip into the underarm notch right up to the stitch line. Press the seams open then press under a second time so that you have a small turn and turn edge running from the underarm notch down to the hem. Top stitch this down close to the fold line on both sides continuing all the way from the underarm notch down to the hem. This stitch line should be visible from the right and wrong side of your garment. Working from the front of the garment stitch over the underarm and split point several times to strengthen this section.
Finally turn the front and back hems to the wrong side with a 1cm turn and turn hem. Pin the hems and facings in place and stitch down making sure you follow the curved edge of the facings at the centre front and centre back.


*After this step is complete go straight to step 6*
5c. SIDE SEAMS, HEMS & ARMHOLES - VIEW 3 ONLY
Measure down from the underarm notch 15cm and make a second notch. With right sides together sew the side seams from the underarm to the second notch with a 1.5cm seam allowance. Press the seams open and continue pressing 1.5cm to the wrong side all the way around the armhole.
Press under a second time so that you have a small turn and turn edge running from the hem and all the way around the armhole. Top stitch this down close to the fold line on both sides continuing all the way around from hem to hem. This stitch line should be visible from the right and wrong side of your garment. Working from the front of the garment stitch over the split point and underarm point several times to strengthen these sections.
Finally turn the front and back hems to the wrong side with a 1cm turn and turn hem. Pin the hems and facings in place and stitch down making sure you follow the curved edge of the facings at the centre front and centre back.


*After this step is complete go straight to step 8*
6. INSERTING SLEEVE - VIEW 1, 2 & 4 ONLY
Fold the sleeves in half and sew the underarm seams. Overlock the seams together and press to the back. You should end up with a pair of sleeves. With the body turned out the wrong way and the sleeve the right way, feed the sleeve inside the body and line up the sleeve armhole with the body armhole.
Match the underarm seams on the sleeves to the side seams of the body, making sure the seam allowances are pressed towards the back. Pin in place around the armhole making sure that the seam allowance on the body armhole is pinned at a right angle, so that the sleeve underarm has free movement here. Sew the armhole with 1cm seam allowance then overlock the seams together and press the seams down into the sleeves.


*After this step is complete continue directly onto the next steps as outlined below.
View 1 & 2: continue on to step 7a.
View 4: continue on to step 7b.
7a. SLEEVE HEM - VIEW 1 & 2 ONLY
Press the sleeve hem to the wrong side with a 1cm turn and turn. Pin in place and top stitch down.


*Once this is completed go straight to STEP 8.
7b. SLEEVE HEM - VIEW 4 ONLY
Place the neck band pieces together with right sides together on one end and measure 40cm away from the edge and draw a vertical line. Cut apart so that you end up with a pair the same size. These will be used as your sleeve hem bands. Put aside the remaining neck band pieces for later.
Fold the sleeve band pieces in half, right side together, and sew together. Press the seams open.
Gather the sleeve hem to fit the size of the sleeve hem band
With the sleeve turned the right way out and the sleeve hem band turned the right way out also, feed the sleeve band into the wrong side of the sleeve hem making sure you line up the seams. Pin the sleeve hem band in place, right side hem band to wrong side sleeve, then stitch together with 1cm seam allowance. Make sure you stitch with the gathers facing up so that you can sew these neatly and evenly in place. Press the sleeve band down along this seam. Press up the other raw edge of the sleeve band 1cm towards the wrong side.
Fold the sleeve band in half to the front to cover the gathers. Pin in place and stitch together through all layers close to the fold line.


*Once this is completed go straight to STEP 8.
8. NECK BAND
These images show garment view 1 but the same technique works for all garment views. For garment view 3 there is an extra step to follow at the end to add buttons and button holes.
Place the neck band pieces right sides together and sew together along one short end with 1cm seam allowance. Press the seams open.
Pin the right side of the neck band to the wrong side of the neck edge, lining up the neck band seam with the left (when worn) body shoulder seam. Pin in place the neck band as far as you can to the neckline on both sides and sew with a 1cm seam allowance. There will be a length of neck band remaining on either end which will become your ties, these pieces will be different lengths on each side.
Press the seam allowance into the neck band and continue pressing in to the wrong side of the neck band by 1cm all the way along the ‘tie’ pieces. Press in all the other raw edges of the neck band 1cm to the wrong side, including the two short ends. Fold the neck band in half, wrong sides together, all the way around. Pin in place and stitch down through all layers close to the fold lines.
Finally tie into a bow at the centre front or centre back if you are working with garment view 1, 2 or 4. For garment view 3 continue with the next and final step.


AND THIS IS HOW THE TIE LOOKS WHEN IT IS AT THE BACK, VIEW 2 and 4.

8. NECK BAND - VIEW 3 ONLY
To close at the back neck you will need to add 2 buttons approximately 18mm big. Overlap the long tie over the short tie leaving a gap between the centre back split edges of 2.5cm. Pin together the ties at the centre back and also add another pin 4cm away from the first pin, on the left side. Mark the size of your button holes by measuring the button size with the right edge of the buttons against the pins. Make a mark on the tie that is pinned at the underside exactly at the pin points. This is where your buttons should be sewn.
Sew button holes and buttons. When the back is buttoned up the long tie will hang down along the back of the garment.


And now you have a finished garment!

