This is an updated tutorial on how to sew the inseam pockets in the ZW Gather Dress. We recently updated all of our patterns and one small change was that we have removed one notch from the side pockets, this is to slightly simplify the construction but also to add a little more depth into them, as far as i'm concerned the larger the pockets the better!
I have done this tutorial using a smaller sized sample for ease of photographing it so keep in mind it is not to scale.
Once you get a handle on how to do it this way I find it to be such an easy way of inserting inseam pockets, it really works great for any type of inseam pocket and makes for a really neat finish. This pocket is attached to the front skirt first before sewing your front and back side seams together. I will be using a single stitch and overlock for this but it is also possible to do a french seam for light weight fabrics. Cross hatching indicates the 'wrong side' of the fabric.
STEP 1.
Fold your packet bag in half, right sides together, and stitch and overlock your bottom edge.


STEP 2.
Attach one side of your pocket bag to the front side seam, right sides together, matching notches, stitch together with a single stitch and snip into the notch further after sewing through both layers ensuring you get very close to the stitch point. Edge stitch this seam back, on the pocket bag side, around 1-2mm from the seam edge, finishing just above the notch. The last image here shows how this should look on the inside (wrong side) of the garment.


STEP 4.
Turn your pocket bag to the inside of the skirt and press the lower part in place and stitch onto the front skirt side seam from the notch down to the bottom of the pocket bag. Leave the top of the pocket bag loose for now. Last image shows the inside (wrong side) view of the garment.


STEP 5.
Sew together your front and back skirt side seams, with a single stitch and overlock, with right sides together, making sure you leave your pocket opening free. Take particular care in making sure you stitch perfectly up into the notch point, where the pocket opening finishes, so that it looks neat from the outside with no raw edges showing. You can do this easily by making sure you stitch from the front skirt side so you can see where your original stitch line is for this section. Press your side seam to the back.


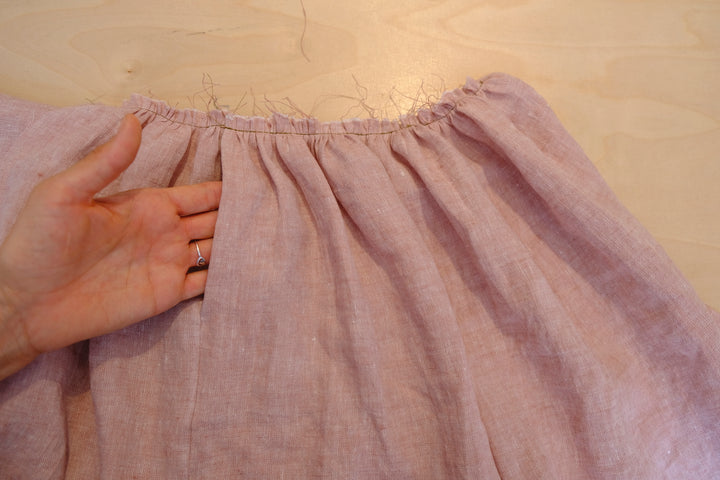
STEP 6.
Gather the top of your front and back skirt pieces accordingly (to fit your front and back bodice pieces), leaving the pocket bag loose at the top. Finally stitch the top of your pocket bag down, making sure that it is sitting flat against the gathers and that the side seams match up. I would recommend stitching on the gathered side of your garment so that you can make sure you keep this neat and don't create any tucks or folds. Last image shows the inside (wrong side) of the garment.
And thats it for inserting your pocket, now the top of your skirt is ready to attach to your bodice!


I hope this is helpful! And a little side note here for anyone that has purchased a copy of the ZW Gather Dress previous to it being updated we are happy to send through a complimentary copy of the updated version if you email us with your order number at info@birgittahelmersson.com
Birgitta x

