I had a piece of patchwork fabric I had been working on for some time and as winter was setting in I thought it would be nice to make a tutorial with it. Considering many of us will be spending a lot of time at home this winter, thanks to the shitstorm that is 2020. So I hope this will be a fun project for anyone that wants to have a go.
I will focus mainly on the garment hack part of this tutorial, which you will need the ZW Coat pattern for, however you can certainly take parts of it to use for other projects, such as the patch-working/quilting aspect of it. Now I am no expert quilter so I have kept the quilting part quite brief as I don’t think this is my area of expertise to teach. I have simply put together a quilted piece of fabric in as simplified way as possible to use for the application of a garment, so I hope it will be fairly straightforward even for a beginner to follow.
For each section I will go through the steps written first and then have all the photos beneath in order, perhaps this will make it easier for anyone that wants to be able to glance through the steps visually without getting overwhelmed by all the text..


To start you will need:
- ZW COAT templates. Short coat collar and neck (optional) template.
- A 120cm length of fabric. The width should be somewhere between 140-155cm. I would choose something fairly heavy with a bit of structure, such as a quilted fabric which I have used (more below on this).
- Scissors
- Long right angle ruler ( If you don’t have this you can just find something with a straight edge, such as a book or large piece of paper)
- Chalk or dissolvable pen.
- Bias binding, enough to cover all the seams, which would be 8-9 metres (optional, you can overlock instead and do the kimono style front, this just means you wont have a reversible garment)
-30mm elastic (optional)
-Buttons, 25-30mm (optional)
PATCH WORK AND QUILTING
I will simply run over the basics here as I am no expert quilter, it is totally up to you wether you want to patchwork your outer fabric. You could also simply just get 2 lengths of fabric, ideally a light-mid weight cotton or linen, and quilt them together with wadding in the middle.
Also if you can I would recommend pre-washed fabrics. You can also wash the whole piece after patch working if this is easer, just make sure it is a little bigger than you need, by around 10%, as it may shrink.
Patch work tips
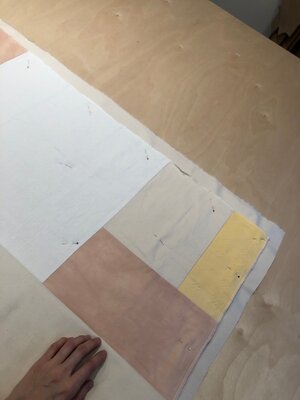
- I like to patch work with straight lines, so squares and rectangles.
-I find it is easiest to put together smaller sections and then sew them together to make a larger piece at the end.
- I like to plan out my patchwork on a large surface, table if you have it, or the floor. You can use a right angle ruler to straighten your offcuts, making sure you follow the grain the best you can.
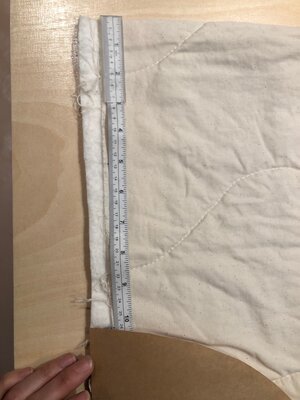
-Make your final piece a little bigger than what you need as you may loose some width here and there once it has been washed and quilted together. For this hack you will need a finished piece that is 120cm x 150cm. Make this at least a few cm’s bigger on all ends and then you can straighten and trim away later on.
- Iron your seams as you go. Do in sections and keep and eye on how flat and even everything is looking before building up a giant piece.
-If you have a 4 thread or 5 thread overlocker I would recommend using this instead of just a straight stitch to sew your seams together. It will make the seams a little bulky so be careful when sewing a lot of panels together to keep everything pressed and smooth and flat, but by doing this you will have far less to secure once you have cut out your garment. For anyone that has done patch-working you will know what I’m talking about. As soon as you cut through anything you have patchworked your stitching will start to unravel and it can be a bit of a pain to secure everything. That being said if you are using a single stitch its not the end of the world, just make sure you secure anywhere that needs it after cutting out your garment pieces. Do this before you start sewing your jacket together as otherwise you will be kicking yourself when all your seams start unravelling after one wear.


QUILTING
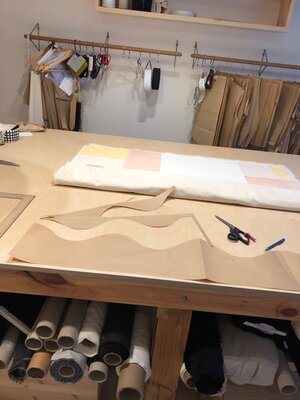
This was super fun actually and you can stitch together all of your layers using any pattern you want, just make a template and draw on your stitch lines using a dissolvable pen, I highly recommend a FriXion pen as this comes straight off once you iron or wash your fabric.
-Cut a backing (this will become the inside of your jacket, and as it will be reversible choose something you would want to see on the outside too). Make your backing a little bigger than your finished size.
-Cut a wadding the same as above. I used Sew Simple Eco wadding (70% recycled cotton / 30% recycled Poly).
-Find a large surface to lay everything out on, such as a large table or on the floor. Make sure all your fabrics are not creased and are nicely ironed.
- You will now want to pin together all your layers, don’t go too overboard yet as you still need to mark out your stitch lines, so perhaps have a pin every 20-30 cm. Try to gently smooth out all your layers as you go so everything looks like it is sitting nice and flat. I would also work from the patchwork fabric side.
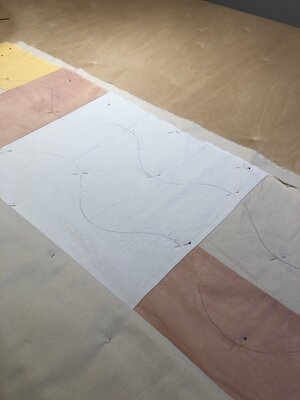
- Make a template using paper, for mine I hand drew a wave like shape on a piece of paper and cut this out, I then used this as a template to trace on where I want my stitch lines to be all the way down the fabric. I also measured between each so that they are more or less even. You could also do straight lines by just ruling lines.
-If you are making the ZW coat hack here, your garment runs along the fabric selvage to selvage, ie your garment lies across the opposite grain line to usual, meaning your length is determined by your fabric width. Just keep this in mind when planning out where you want to sew your quilting lines.
-Finally add more pins, and adjust any necessary now that you have your stitch pattern drawn on. Concentrate on pinning along all the stitch lines as this will help when you are sewing.
-Sew using your machine, I like to use as wide a stitch as possible here, because I like how it looks and also it is easier to sew over all the layers. I found it easiest to roll up one end of my fabric and slowly work through it in sections as I went.
- Finally do one last press, lay your fabric again on a flat surface and cut exactly to size, 120cm x 150cm.


CUTTING/ZW COAT HACK
STEP 1:
-Fold your fabric in half, selvage to selvage, or the 150cm quilted length in half.
-You will be dong a similar cutting layout to the ZW Short Coat. Place your ZW Short coat collar template on the fabric, approx 26cm down from the shoulder/folded edge. This will give you the curve under your arm. Use a ruler to extend the straight line all the way to the bottom. Do this on both sides of your folded fabric.
- Cut away a rectangle from the bottom of each shape you have drawn. These will be your pockets. Make one pair of pockets approx 25cm high, and the other approx 18. I used the 18cm pockets going the other direction, so your pockets are 18cm wide including seam allowance, and the height is determined by your collar template width.
- The remaining curved pieces will become your sleeve bands. You will use one long and one short one for each sleeve.


STEP 2:
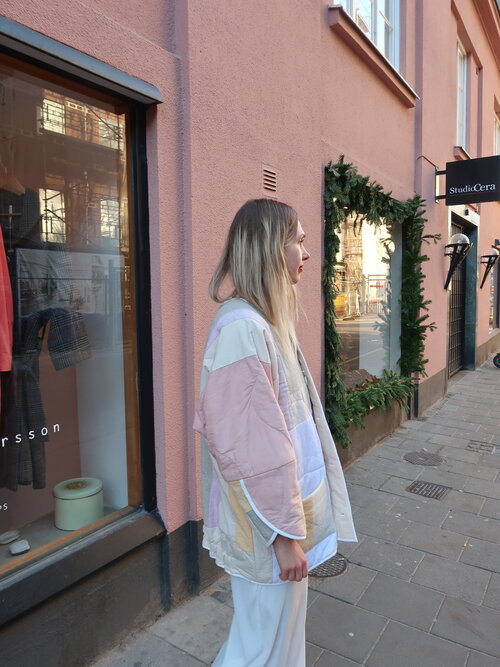
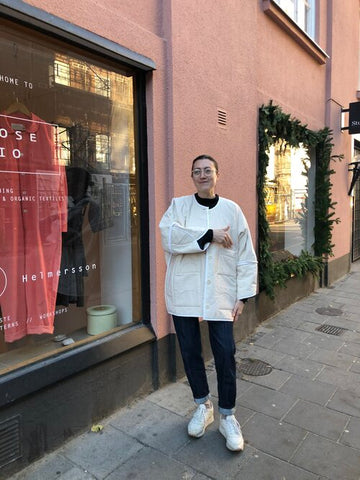
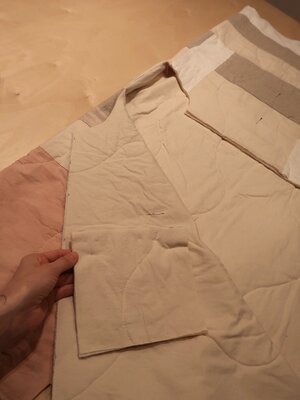
- Now fold your fabric in half the other way, end to end, or the 120cm quilted length in half. Measure your halfway point, this is your shoulder point. Trace out your neckline here, as you would with the original short coat cutting plan. There are 2 options here. You can use your Short ZW Coat neck template here and create more of a kimono type front, This is like the pink duster I made a few weeks ago. Your CF edges are folded inside to create your facings, as per the original pattern but its just without the collar. This looks lovely if you want to make a belt/sash to tie at the waist. OR draw your own new neck shape, I drew a simple crew neck shape, I made it 7.5cm wide (from the folded edge) and 10cm deep.
- Cut away your neckline, ONLY cut the front part away (curve or triangular type shape depending on which neck you use) . The uncut part will be your fold line, you fold you front neck cut out back to create your back neck facing.
-Finally cut down the CF line on the fold.
Now you have all the pieces you need to start sewing.


And here is what I mean by the ‘kimono’ type front if this is what you choose….

SEWING
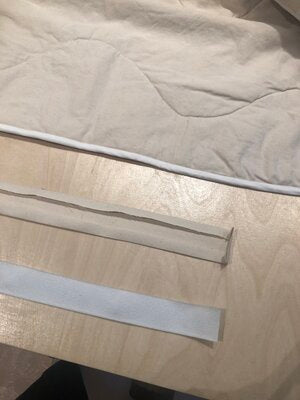
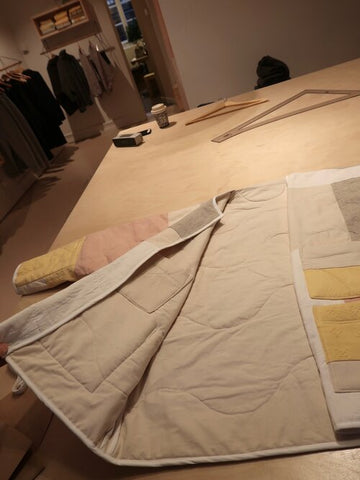
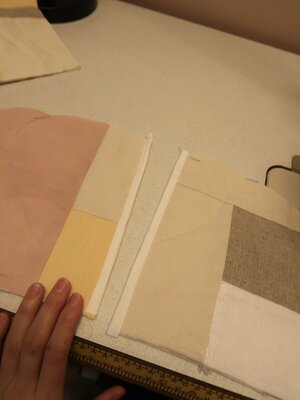
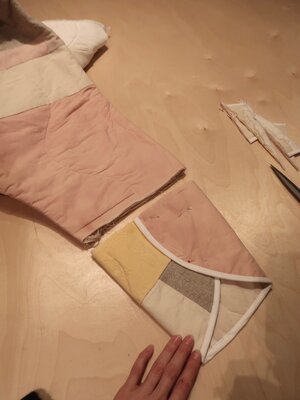
First secure stitch any quilted areas you need to as these can unravel very easily once they have been cut. All seams will be bound, I have cut my own binding here using a lightweight white organic cotton, approx 30mm wide.
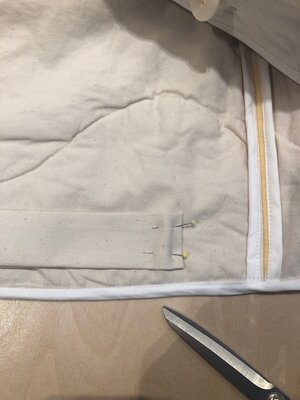
- Fold down the tops of all of your pockets approx 4-5cm and single stitch. I also overlocked all of my pocket edges so that they don’t fray, but this is totally optional.
- Pin on your pockets to where you would like them on the front bodies. I would suggest draping the garment over yourself and deciding where they look best. I used 3 on the outside and 1 on the inside. Stitch on your pockets.


-Bind all of your side seams separately, sew your side seams together and press open.
-Bind your neck/back facing edge all in one.
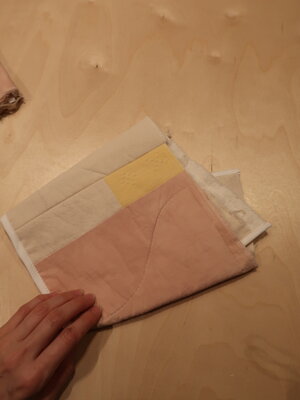
-Turn back the front neck and pin in place and stitch down. I wanted the whole inside of my garment to be the natural cotton so I turned my facing to the ‘outside’ patchwork side of my jacket.


- Bind your body hem edge.
- Bind your Cf edges, leaving some extra on top and bottom so you can fold in and neaten here as this will be your finished centre front edge. (if you are using the ‘kimono’ style front using the short coat neck template, here you can simply fold back and turn under 1cm seam allowance to neaten the raw edge. I would either hand stitch in place or single stitch, but this will be very thick if you are using a quilted fabric and using a machine to stitch down)


- Bind the straight seams of your sleeve hem bands and sew together.
-Bind the curved edge of your sleeve hem band.


-Fold and join and overlap the edges, making sure your finished width fits the finished width of your sleeve hem of your body. Here I also angled the panel so that it came in more at the hem of the sleeve band, I then cut away the small amount of excess along the top. Pin in place and sew together from both sides.


- Bind the other side of the sleeve hem band and also the sleeve hem of the body.
- Sew the sleeve band to the sleeve of the body.


- Add buttons and button holes (optional). I did buttons on both sides and sewed with a shank, this way it’s fully reversible and you can do up both ways. If you are doing a kimono type front you can simply make a matching belt from a length of fabric and close with a tie.


EXTRAS
-I added an elastic casing into the back hem. To do this I cut a piece of 30mm elastic to the width I wanted to bring in the back. I then cut a casing out of a lightweight cotton fabric, I made this the same width as the back hem
Now the rest is in pictures, I hope it clear enough to follow! And I hope this has been helpful, good luck!
Birgitta x