This tutorial takes you through the construction of the body and sleeve of the ZW Bell Jacket in the OUTER fabric, with more in-depth photos to show the steps as clearly as possible.
*The sewing steps are numbered in order based on the PDF Instructions Booklet.
STEP 2A
With right sides together place the front shoulders on the back shoulder and sew together, matching the notch on the back neck to the front neck edge. Press seams open as far as you can along the shoulder seams.


*I'll let you in on a little secret here....I am making a very luxe long version of this coat, it's looking so good! To make this all you need to do is add the required length to the body of the pattern, for this one I added an extra 55cm. For size TWO you will need to add length a little differently, you can refer to the Pattern Adjustments tips at the end of the Instruction Booklet for more.*

STEP 2B
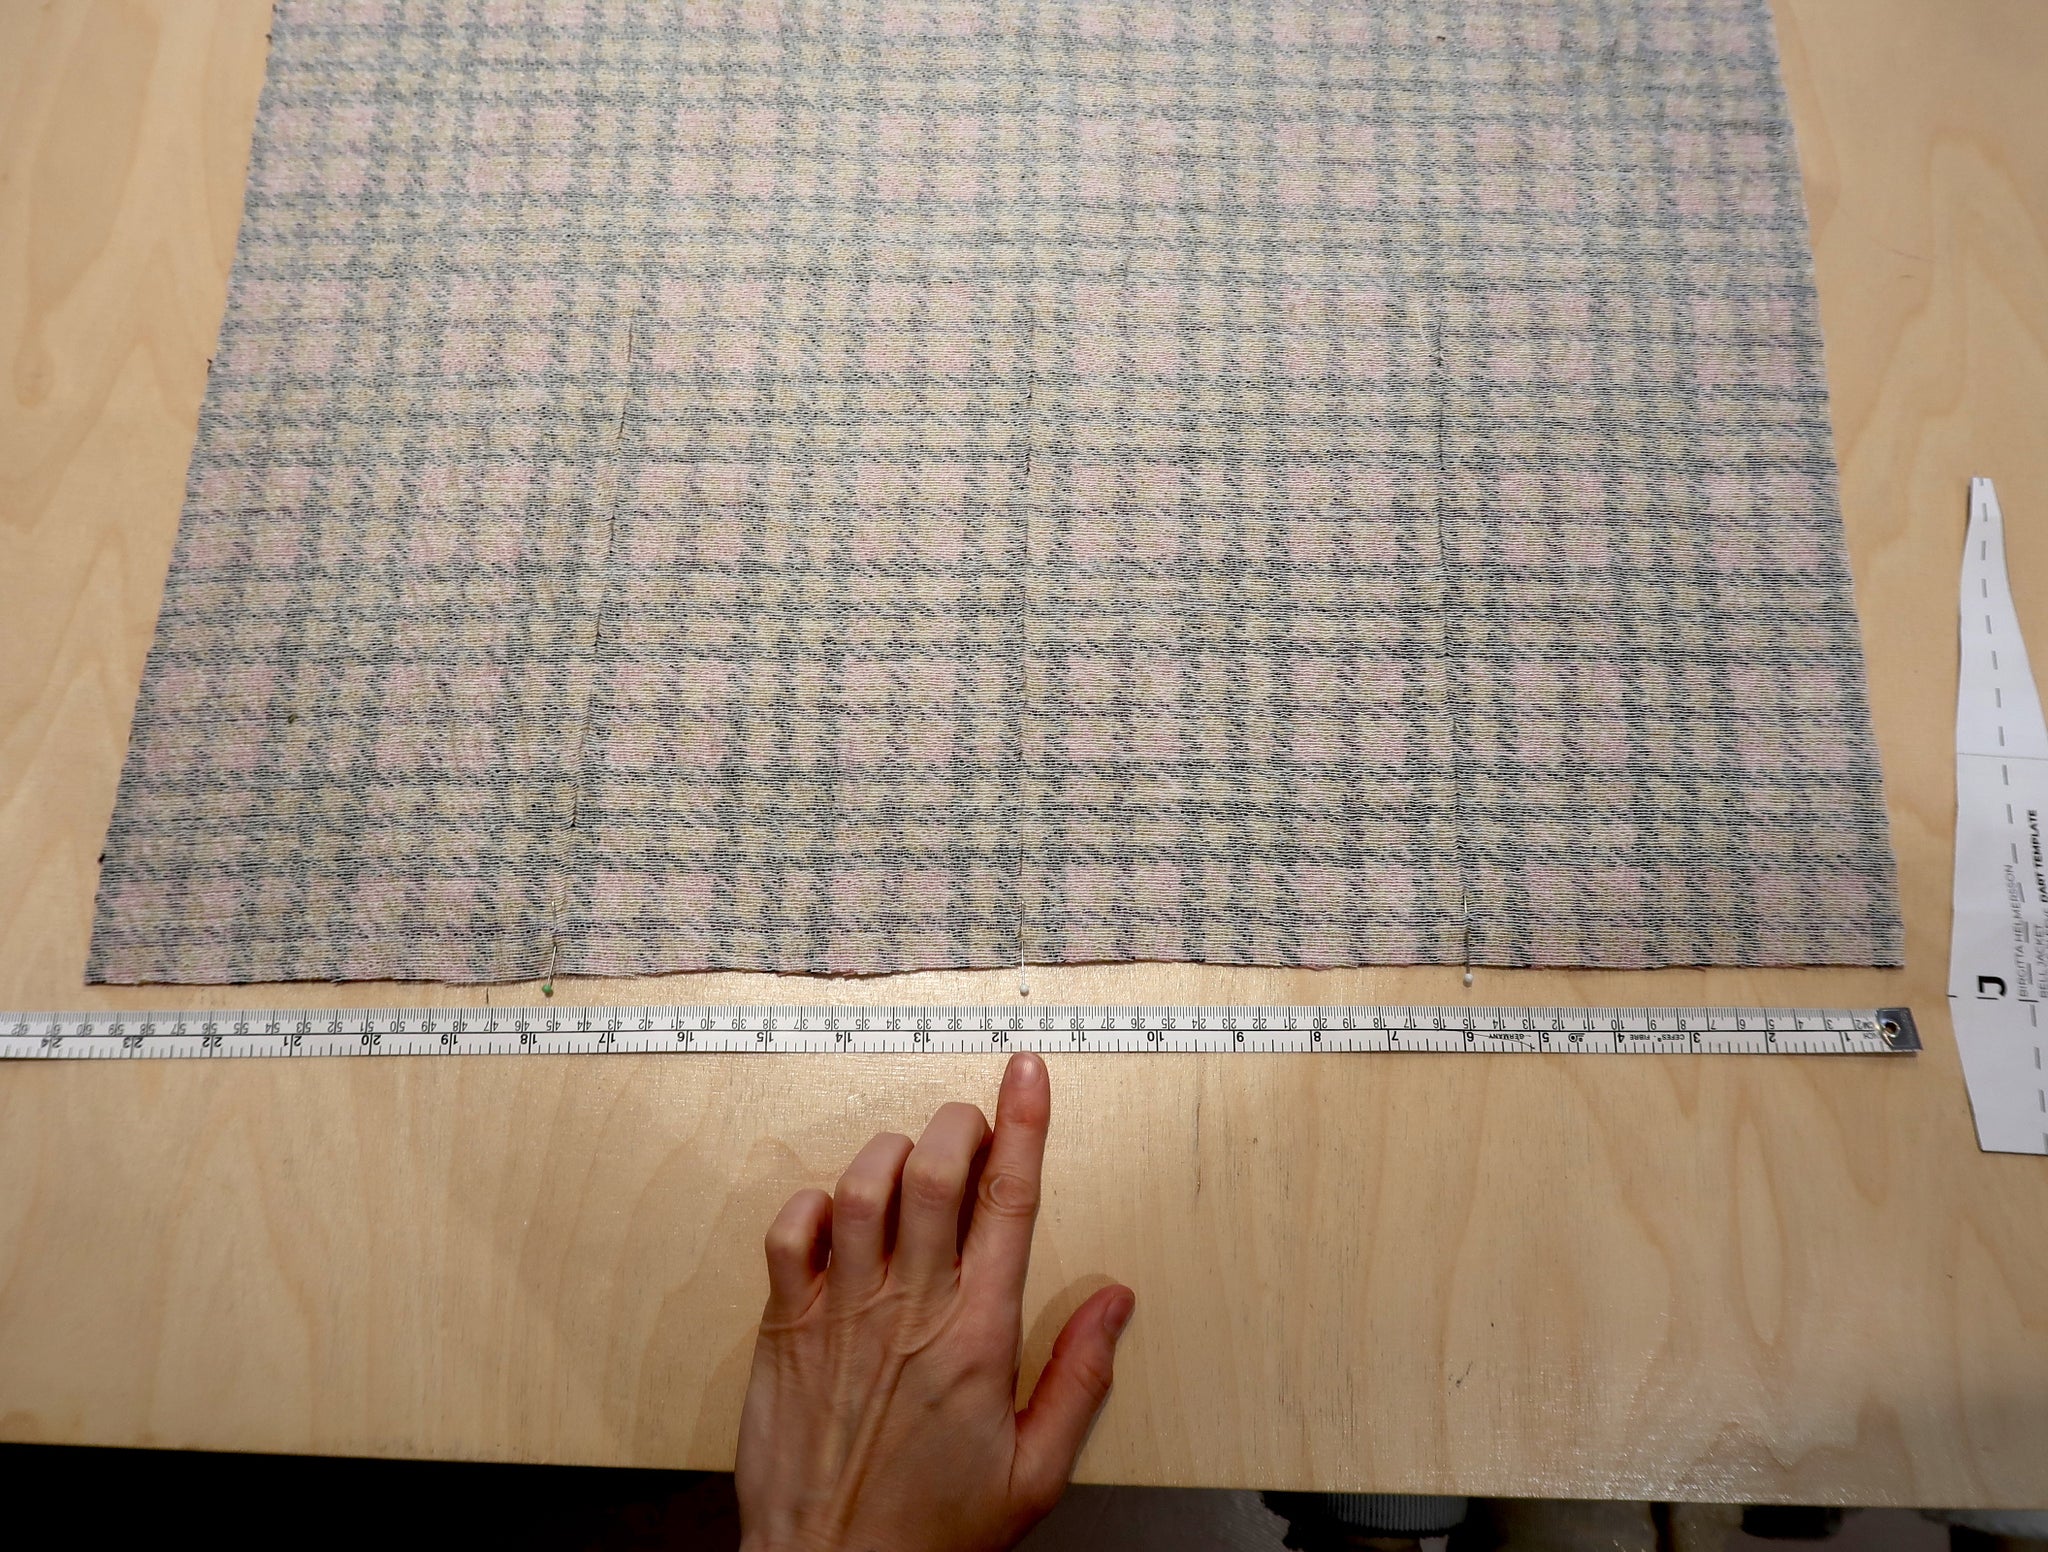
Mark darts using templates J and K, on the wrong side of the fabric, on the sleeve hems. These templates allow for a 5cm hem allowance.
Divide the sleeve hem into 4 equal quarters. Mark one dart in the very centre of the sleeve hem using template J, then mark one on either side, these ones centred between the side seams and centre dart, also using template J. Using template K, mark darts (called darts for consistency, but this is more like side seam shaping here) on the left and right side seams. There should be 5 dart markings in total on each sleeve.
TIPS: Before sewing it can be really helpful to cut a notch at the start point of each dart/shaping on the bottom raw edge of the hem.


STEP 2C
With right sides together fold the sleeve in the centre matching underarm edges together. Sew the centre sleeve seam by following the dart markings. Sew the underarm seams together starting with 1cm / 0.375” seam allowance at the top and continuing down along the markings for the side seam ‘dart’. Press underarm seams open.


STEP 2D
Open out the sleeve so that the underarm seam is in the centre and so that the other 2 darts are on the fold. Sew the sleeve darts by following the dart markings.


STEP 2E
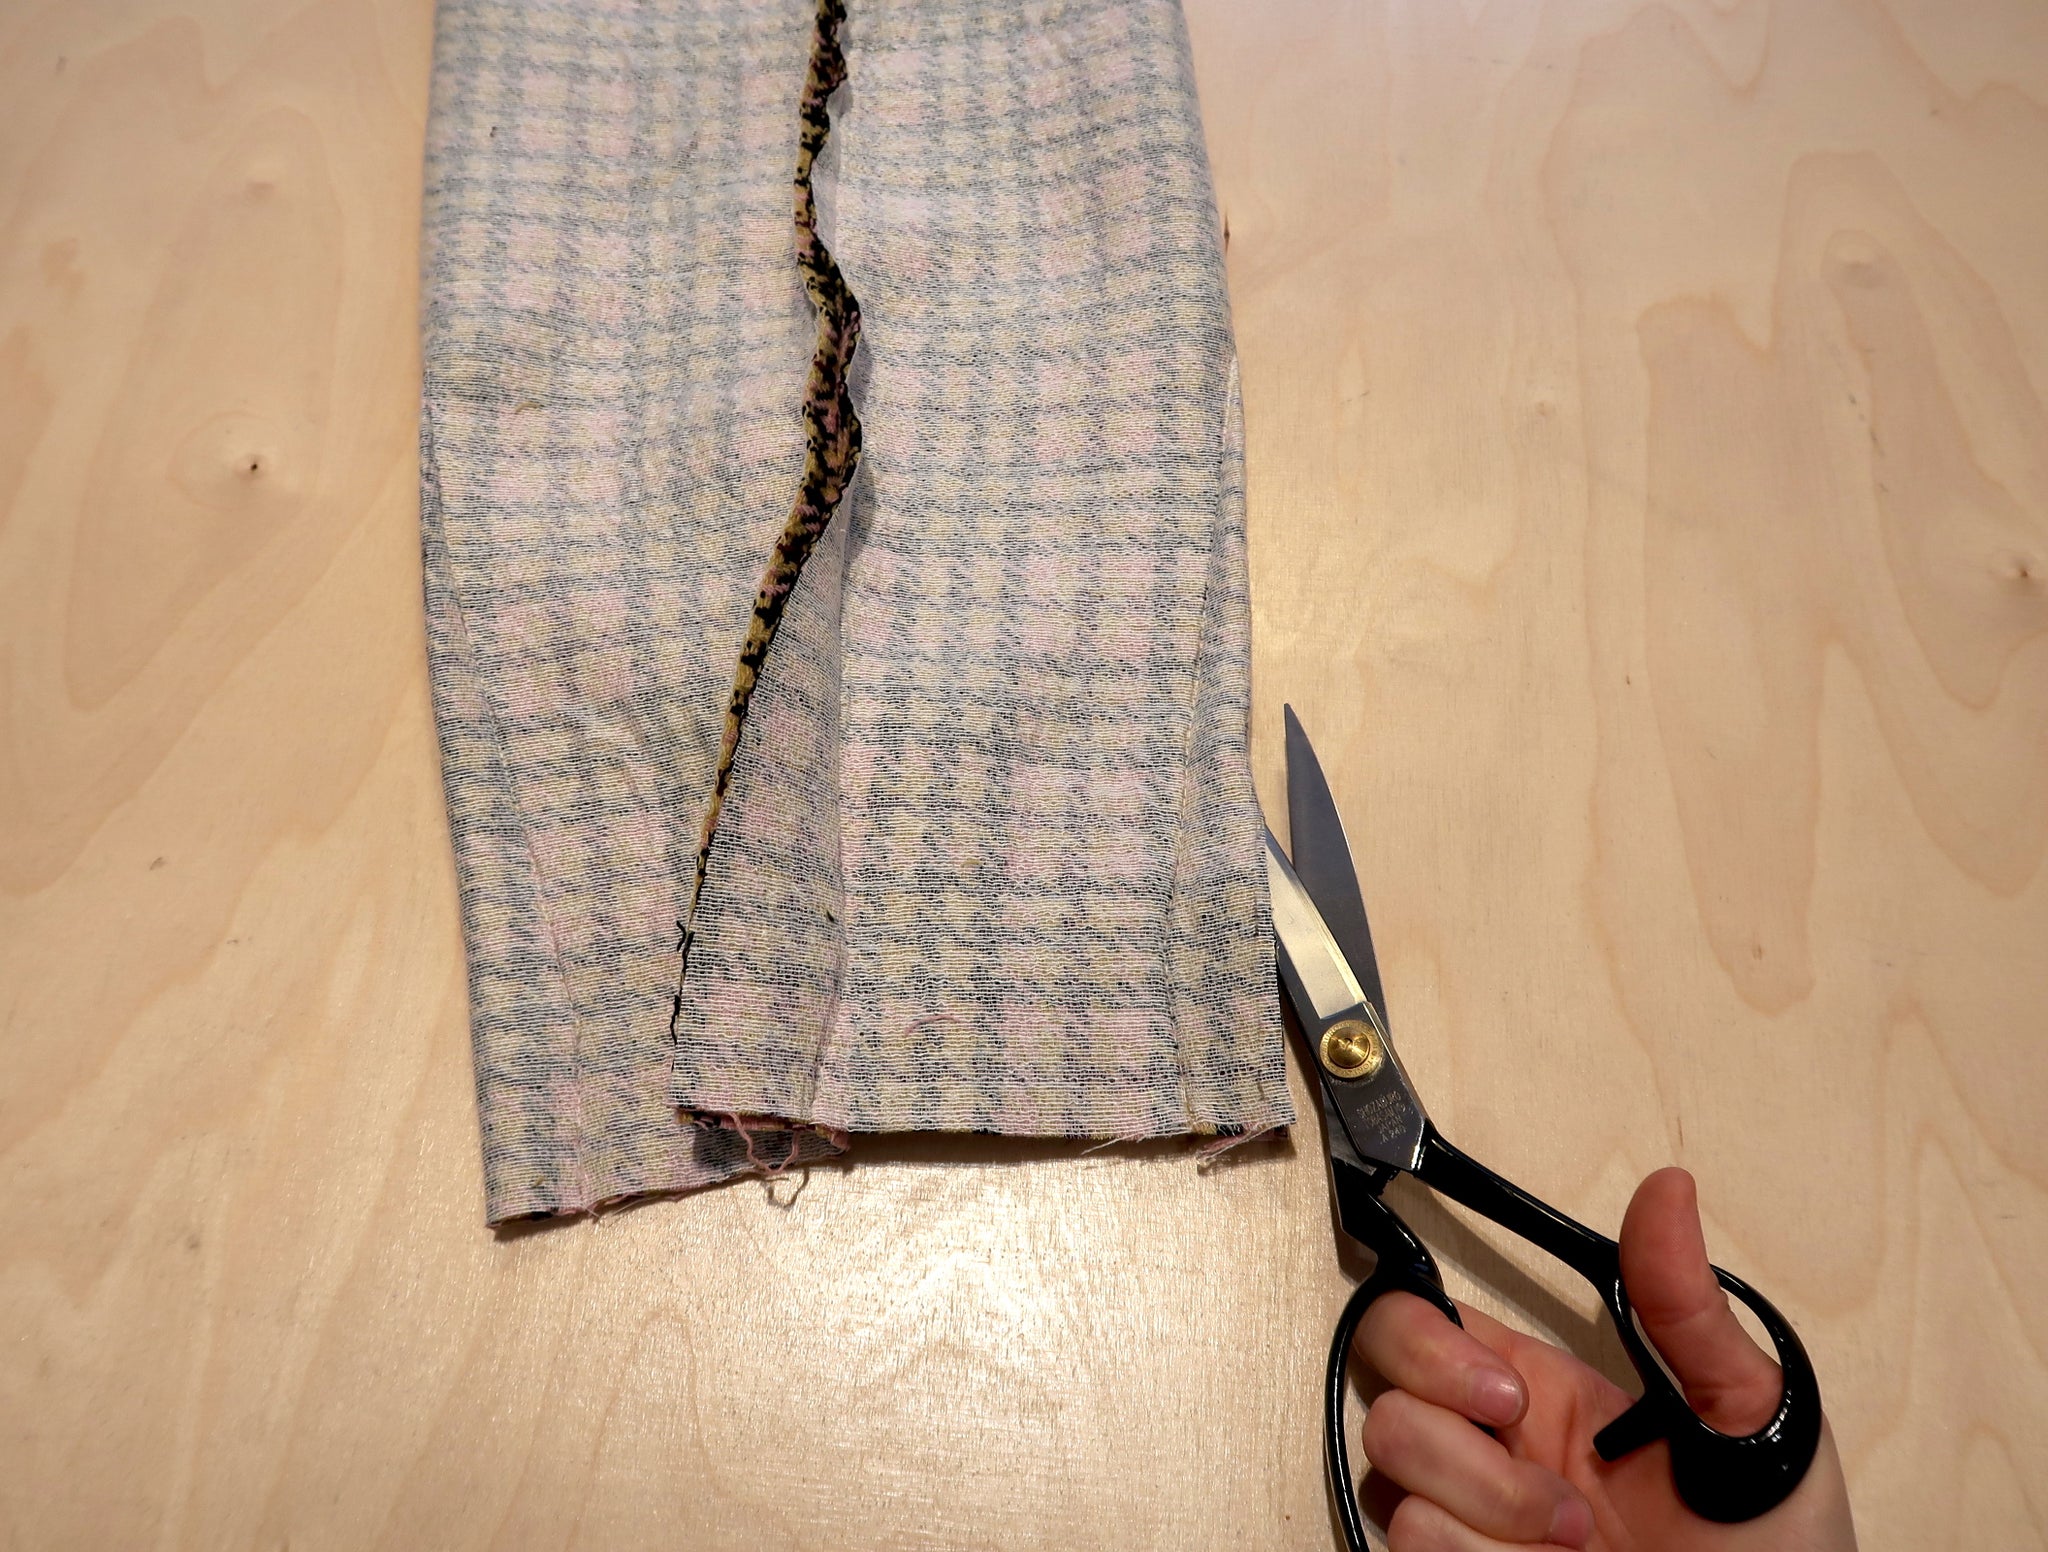
Starting at the hem cut into the centre fold line of each dart up to around 1.5cm / 0.5” away from the finished point of the dart. Press all darts open and then do a stitch around the hem of the sleeve to secure the seam allowances in place.


STEP 2F
Sew the sleeve to the armhole making sure you match the sleeve underarm seam to the front armhole notch on the body, the centre notch on the sleeve to the shoulder seam, and the double notch on the sleeve to the double notch on the back armhole. Gently press seams down towards the sleeve.


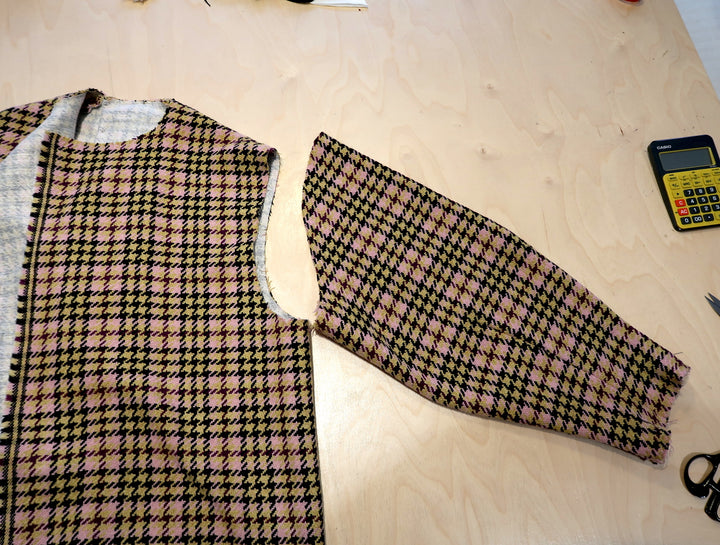
And there you have it, sleeve and body is constructed.


