This tutorial is for our latest pattern release, the ZW TIER DRESS. This shows the bodice construction in a little more detail and some simple little tricks to bagging out the straps neatly and attaching the gathered dress to the bodice. Ive broken this up into a few sections. SEWING STRAPS, BODICE & BAGGING OUT STRAPS, ATTACHING GATHERED DRESS.
1. SEWING STRAPS
Start by pressing in the edges of the straps approximately 1cm, then fold in half and top stitch together with an edge stitch on both sides.


2. BODICE CONSTRUCTION & BAGGING OUT STRAPS
2a. Sew the CF seam together of the front bodice lining (B) and then press open. (if you are working with a size 3XL or above you will also need to sew together the CF seam of the front bodice (A) in the same way).


2b. Sew the bodice (A) and bodice lining (B) together on both sides with a single stitch, right sides of the fabric facing together.


2c. Turn out the bodice the right way and do an edge stitch to secure down the seam allowance, on the bodice lining (B) side only. I feel like this is one of the steps that can often be mis-understood in the patterns and I find it quite difficult to explain with only text and illustrations! This edge stitch should only be visible on the bodice lining side and is done to ensure that the lining does not roll out to the front and so that everything sits nice and flat when pressed. Once you have finished your front bodice, repeat the same steps for the back bodice (C+D).
*Another little side note here, if anyone is wondering if there is a difference between the bodice outer (A + C) and bodice lining (B + D) pattern pieces, as they do look very similar, yes there is a difference! The bodice lining pieces are a tiny bit smaller in the width compared to the outer, this is so that when these pieces are sewn together and bagged out they sit just right! The lining in a garment often sits much better if it is slightly smaller.


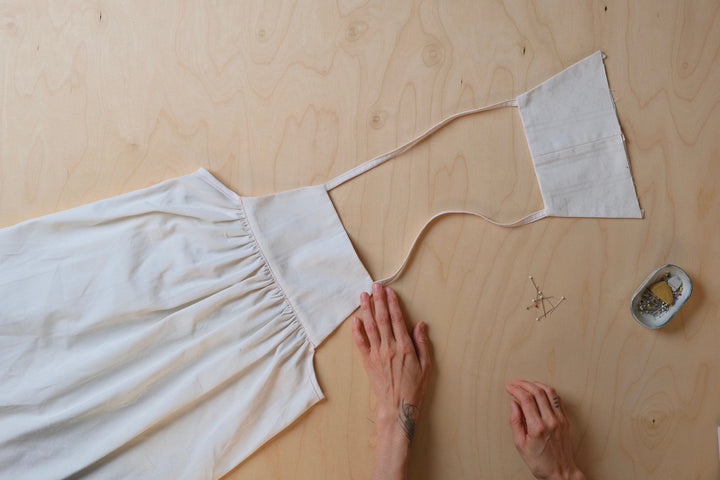
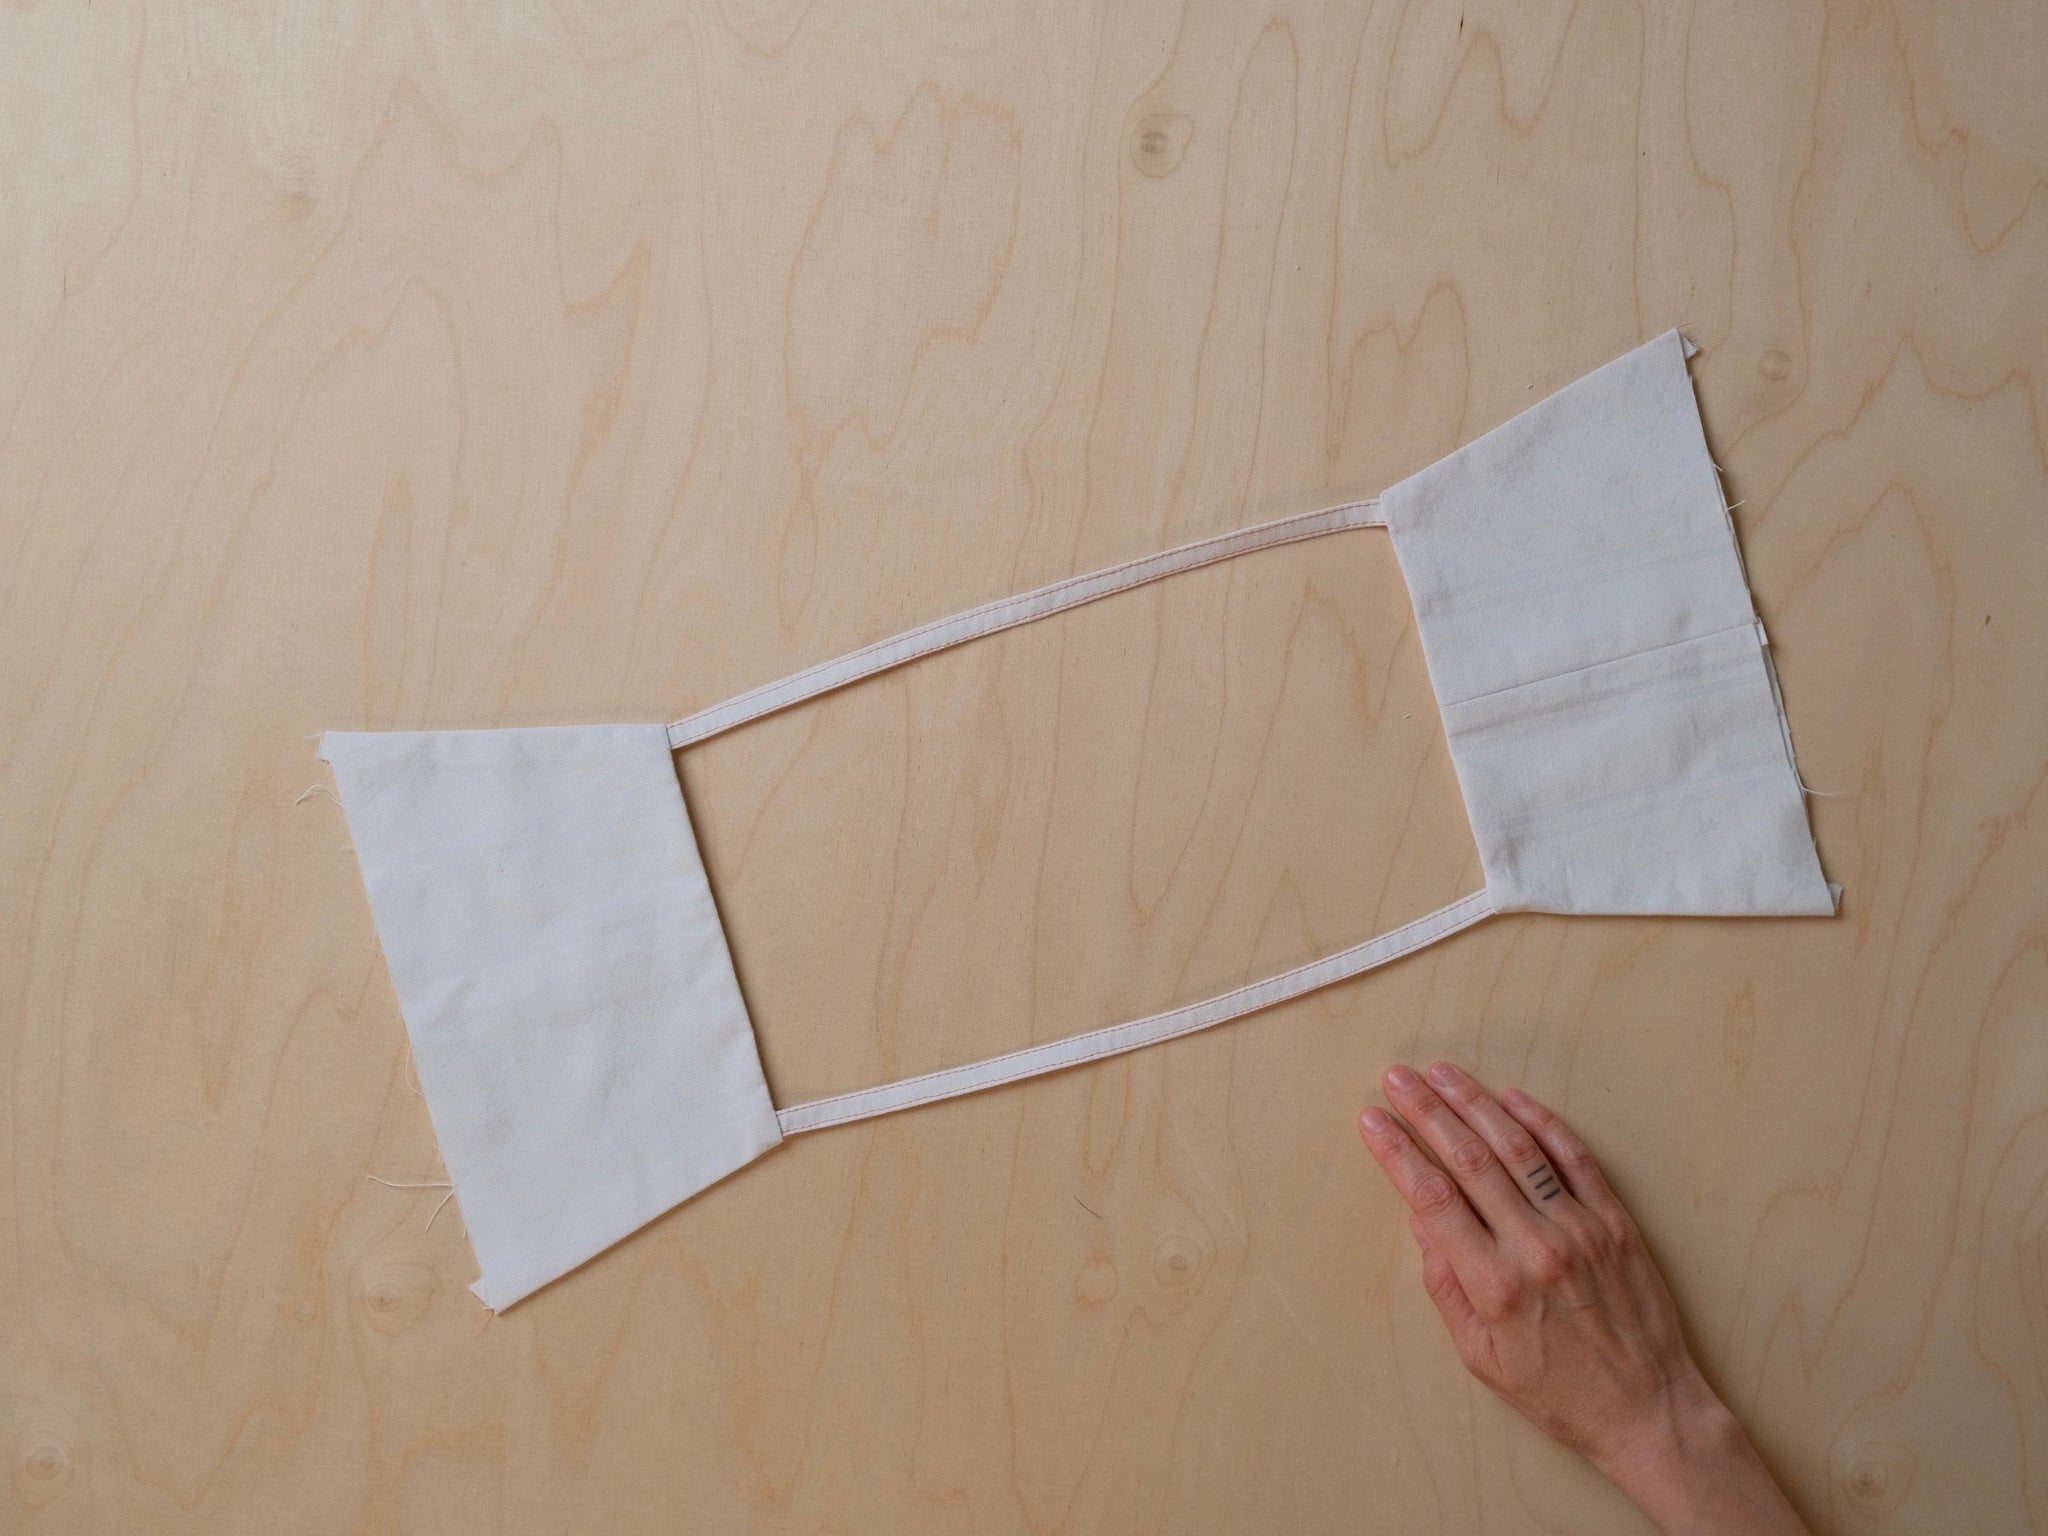
2d. BAGGING OUT THE STRAPS: Attach the straps with a single stitch to the front bodice (A) on the right side of the fabric, make sure it is sitting right up against the side seam.


2e. Turn your bodice to the inside, so you are exposing the 'wrong side' of the fabric, and bag out the straps by joining the bodice and bodice lining together with a single stitch across the top. Make sure that your side seams are folded neatly down to the lining side and that the straps are sitting neatly into these edges. Bag out the right way and then do an edge stitch as far as you can between the straps to hold down the seam allowance on the bodice lining side (B). This edge stitch is done in the same way as the side seams, step 2C. Finally press in place and then repeat for the back bodice.


3. ATTACHING GATHERED DRESS
3a. Gather your pre-prepared dress (I shall not go into detail on the dress for this tutorial!) to fit the front and back bodice.

3b. Sew the gathered section to the bodice (A) with right sides of the fabric together. It is really important here that you make sure you sew on the sides with the gathers so you can make sure they are sitting neatly and evenly as you sew. Make sure that the bound edges of the dress underarms are sitting neatly up against the side seams, similar to how the strap was attached in step 2d.


3c. After sewing lift up the bodice and gently press the seam where the bodice and gathered skirt are joined (do this from the front of the garment). Turn under the 1cm seam allowance on the bodice lining, making sure that the side edges are turned in neatly. Pin in place making sure that you cover the existing seam. I have pinned on the inside of the garment but you can also pin from the front if you prefer. Finally do a top stitch through all layers along the bottom edge of the bodice, making sure that you catch the lining as you go. Repeat steps for the back bodice/dress.
*TIPS if you prefer not have a visible top stitch here you can instead hand tack the lining down on the inside.


EXTRAS: SHORTENING STRAPS : This is a little extra bit here on shortening the straps. This pattern has a longer strap which will need to be shortened to your preference once you try the dress on. The most simple way to do this is to shorten it at the end by folding down the amount you want to shorten and then stitching the strap together.
*TIPS: If this is too bulky you can instead determine the finished strap length before bagging the strap out into the back bodice, this way you will have this lovely neat finish on both sides of the garment. You can either leave the excess length of the strap inside the back bodice between then outer and the lining, or trim away the excess.


And that's it for this tutorial! I hope this is helpful to anyone trying to get a neater finish here!
We have couple more tutorials planned for the ZW TIER DRESS in the coming weeks. If there is something in particular you would like to see a tutorial on for this pattern feel free to get in touch via info@birgittahelmersson.com
Birgitta x

