*Update! If you want to do a button fly here instead head to this TUTORIAL when you get to step 5.
This is a hack using the ZW BLOCK PANT pattern, which removes the elasticated waistband to instead give you a flat waistband at the front and sides with a zip and button fly closure at the centre front. This is a great way of making the block pant have a more fitted, tailored look at the waist, with a smaller section of elastic at the centre back for ultimate comfort. This pant also features darts to create more shaping from the waist down to the hips.
Now I need to warn you, this tutorial was epic to put together, I think I counted around 80 images in total, BUT I hope that I have made it as clear as possible. On that note I would definitely recommend this tutorial for more seasoned sewists, unless you are a pretty confident beginner who is up for a challenge!
This hack is also great to see how to put a fly front into a pant with a zip, I do mine a little differently from some other methods I've seen. I can't quite remember if I was taught to do it this way a long time ago or if I morphed into doing it like this along the way, but I find this method the easiest, so I hope you enjoy learning it!
This hack is broken up into 2 sections, CUTTING and SEWING. Please read the SIZING carefully below as this is a little more fitted in the waist so you may need to go up a size from what you would normally use with the original ZW Block Pant Pattern.
*ALL MEASUREMENTS ARE SHOWN IN CM'S. MOST SEAM ALLOWANCES ARE 1CM UNLESS OTHERWISE SPECIFIED.
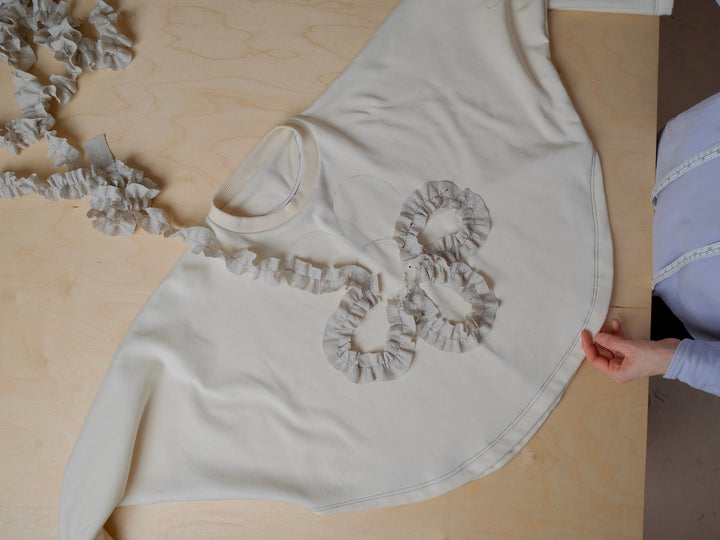
Here Shoko is wearing a size SMALL in our ZWBLOCKPANT - LILAC ORGANIC COTTON.


To complete this hack you will need:
-A 16cm zip to add into the fly front. You will need to use the below cutting steps as you follow your main Block Pant cutting plan. The below steps will need to be added in as you go.
-One 2-2.5cm button to close the waistband at the centre front.
-A length of 5cm / 2" wide elastic for the centre back waistband (see your size below for detailed measurements)
-Heavy weight fusing to fuse your left and right front/side waistband pieces, and fly facing.
- A length of binding to finish the inside edge of the waistband (as per instructions in the main pattern)
SIZING : FINISHED WAIST SIZE
The following adjustments will change the maximum stretched waistband size which means you may need to choose a size up from what you normally go for. Read below to see finished waist band measurements for each size, shown here as flat - stretched (accounting for the elasticated panel int the back waistband)

CUTTING
STEP 1 - FLY
After you have completed 'Cutting Steps' 1 of 2 and you have sewn piece C to piece A/B, cut a 5.5cm strip from the end of piece A as per the diagram below.....

You will then use this strip to cut the below pieces, this layout changes slightly depending on which size you are using. Please note when using sizes XL-3XL there will be a small rectangular off-cut. Either find a way to use this in your garment, or save it to re-purpose into another project.
1: Fly placket
2: Fly facing
3: Belt Loops
XS-L - CUTTING PLAN

XL-6XL - CUTTING PLAN

STEP 2: ADJUST THE FRONT WAIST DROP
Before cutting out the rest of your pieces you need to adjust the front waist drop from 2cm to 1cm, this is the step you will find on page 5 of your CUTTING PLAN labelled as 'Angle waist line into front'. With this change you can now cut all of your pieces as per the main instructions.
STEP 3 - WAISTBAND
Take your front and back waist band pieces that you have already cut by following the main ZW BLOCK PANT instructions (pieces D from the main CUTTING PLAN) and cut as per the below instructions. Each size has slightly different measurements, refer to size chart below for detailed measurements by size, the cutting plan is shown at the bottom with this layout being used for all sizes.
4: Right front waistband
5: Left front waistband
6: Centre back waistband (cut 2)
7: Belt loop (cut 2)
8: Belt loop
9: Elastic length (this refers to how long to cut your 5cm wide elastic by size)
MEASUREMENT CHART - WAISTBAND AND ELASTIC

ALL SIZES - CUTTING PLAN 
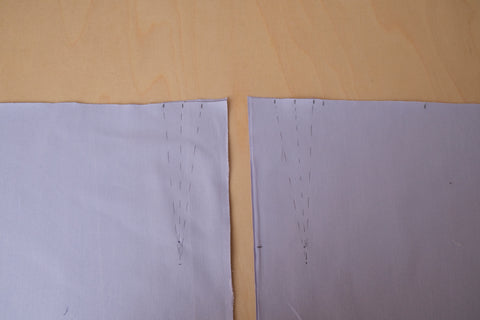
STEP 4 : NOTCHES
After all these pieces are cut put notches into your left and right waistbands as per the below diagram. Your right waist band (piece 4) has a notch 1cm away from the end, your left waist band (piece 5) has a notch 5cm and 1cm away from the end. The below diagram shows the order of your waist band pieces with centre front (CF) and centre back (CB).

STEP 4 : DARTS AND FRONT PLEAT
DARTS: Once your front and back pant legs have been cut (pieces A and B/C in the main pattern) you can add in your markings for side seam darts. These are placed at all 4 side seams. The centre of the dart begins 4.5cm in from each side seam, the dart width is 4cm in total and the length is 16cm.
FRONT PLEAT: The front pleat will need to be made slightly larger, make sure your pleat starts at the same notch on the centre front side (refer to the main CUTTING PLAN by size). Your total pleat size changes depending on what size you are using. See below for more...
XS-XL : Total pleat size 10.5cm
2XL-6XL : Total pleat size 11cm

SEWING
Step 1: FUSING
You will need to fuse the inside (wrong side) of your left and right waist band (pieces 4 + 5) , your fly facing (piece 2) and one of your fly plackets (piece 1). I recommend using a fairly heavy weight fusing so that your waistband is nice and structured.


STEP 2: WAISTBAND
2a:
Sew together your centre back (CB) and sew your front/side waistband pieces to your back waistband pieces, with 1cm seam allowance (S/A). Press all seams open.


2.b
Binding: Use a binding width of between 3-4cm. It is very important that you attach the binding on the correct side as your right waistband overlaps your left waistband. Follow the layout below and you should be good! Below shows the waist band from left to right.

Sew your binding onto the outside first with 0.5cm S/A, then press down, turn to the inside and pin in place. The inside part of the binding can remain raw as this will be hidden inside your waistband when finished. This is a great way to sew your binding onto a waistband as it is not as bulky as doing a more traditional bind.


2.c
Fold the ends of your waistband in half, right sides together, pin in place and bag out with 1cm S/A.


You can now put aside your waistband and elastic for later.


STEP 3. DARTS + PLEAT
3.a
Pin your darts in place on the inside (wrong side) and sew. Do this on all 4 side pant legs near the side seams. Press darts AWAY from your side seam.


3.b
Fold your pleats towards your side seams from notch to notch, pin in place and secure stitch across the top to hold in place, approximately 0.5 cm down from the top.


STEP 4. POCKETS
4.a
You will need to attach your pockets a little higher than your pant as due to the darts and pleat the top of your pant has a curve in it. To account for this offset your top pocket edge by approx 1.5cm by raising it up above the waist line of the pant. Make sure you still sew your pocket opening 17cm down from the top of the pant. The excess at the top of your pocket will be hidden in the waistband later on. Im not going to go into further details on how to sew the pocket as you can find this info in the pattern, or by heading to our pocket tutorial on the ZW GATHER DRESS POCKETS, as they are done the same way.


4.b
If you are working with a smaller size you may need to trim off a part of the pocket as once the pleats are put in your pocket bag can get a little close to the centre front fly. I would suggest doing this for sizes XS-M. To do this cut off a triangular piece as shown below, so that you don't loose any width/depth in your pocket bag. Yes I know not zero waste, but you need to have a functional pant also. Save the scraps for something else!


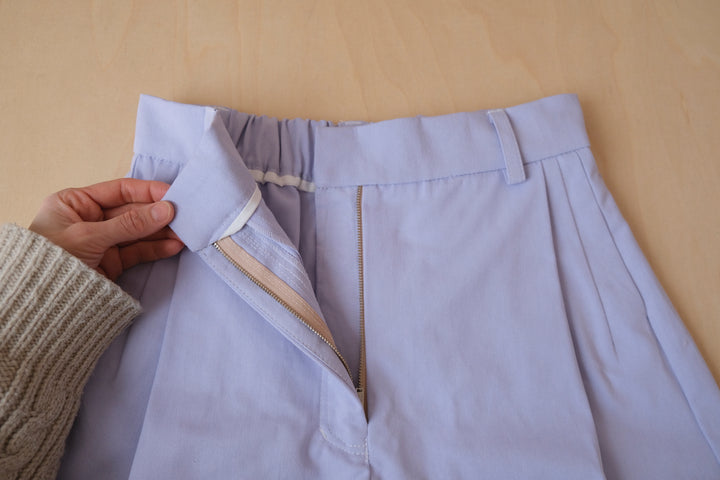
STEP 5. FLY + ZIP
*Update! If you want to do a button fly here instead head to this TUTORIAL for step 5.
5.a
Now it's time to attach your fly and zip. Start by overlocking your centre front pant seams separately.
Below you can see your right pant requires the fly facing (piece 2) and your left pant requires your fly placket (pieces 1). Start by sewing together your fly plackets, right sides (pieces 1) together, with 0.5cm S/A. Press the seam away and edge stitch to hold in place. Turn back the bottom edge and bag out with 0.5cm S/A. Once you have bagged out and pressed this piece, sew together the other edge, raw side, and finally overlock to finish.


5.b
Attach your fly facing (piece 2) to your right pant. Start by overlocking the side and bottom of your fly facing, then attach the non overlocked side to your centre front (CF) pant, with right sides together and 1cm S/A. Press the fly facing and all seams away from the CF and edge stitch down.


5.c
Now take your zip and pin it to your fly facing making sure that you leave at least 1.5cm gap at the top before the zip teeth start so that you wont be sewing over metal later! I like to line up the other end of the tape with the centre front seam which always sets the zip in a really good position. When you get to the bottom of the zip angle out the bottom part of the tape, starting around 5cm up from the bottom, with the tape extending out over your CF seam around 0.8cm, as shown below. Sew your zip down to the fly facing, I like to do one line of stitching as close to the zip as possible, using a regular machine foot, and then a second row of stitching on the far edge of the tape so it doesn't flap around. The final image here shows how it will look when turning your fly facing to the inside.


5.d
You will now need to sew together your centre front crotch seam, extending around 2-3cm past your fly facing. Make sure you cover your fly facing so that it is not visible from the outside of the pant when sewn.
Pin your fly facing neatly to the inside and top stitch down from the outside, making a curve at the bottom, before finishing as close as possible to the CF seam. I like to do 2 rows of stitching here as I think it looks super profesh on a fly front when your garment is finished.


5.e
Now stitch the other side of your zip to the left CF pant. Pin your zip in place and angle in the bottom slightly so that it sits flat and even, form the inside and outside, you will know when its sitting right as your fly will be sitting perfectly from the front. Sew your zip tape to your CF pant using a half foot so you can get fairly close to the teeth, making sure you angle out your stitch line accordingly along the bottom of the tape. Now do a second row of stitching to hold down the edge of your tape.


5.f
Attach your fly placket to your left front, pinning it in place on top of where you have just sewn the zip. Using your half foot stitch this in place all the way down. Finally top stitch one little corner at the bottom through all layers so that your facing does not flap around.


Now you can sew together your side seams, and the rest of your pant as per the main instructions right up until you need to attach the waistband. You should also secure the pocket bags to the top of your pant, making sure that it is sitting nicely, see below.


STEP 6. WAISTBAND
6.a
We are now up to the final stage! Start by sewing your belt loops. You have 5 belt loops, some may be slightly different widths and lengths so make sure you order them so that they are symmetrical. I will use piece 8 for the CB, pieces 3 for the back sides as they are a little wider, and pieces 7 for the side fronts. Fold your belt loops in half and turn in both edges. Pin in place and top stitch together with a double stitch. Line up all of your belt loops and mark them so that they are all the same height, you will not need to trim this off but rather have this sitting slightly further into your waistband.


Now pin your belt loops on and secure them in place by sewing across the top, around 0.5cm down. Your back side belt loops should line up with the side seams of your back waistbands. You can measure where this should sit by placing your waist band above your pant and lining up your CB seams, as shown below.

Front belt loops should sit near your front pleats, this location may change a bit depending on which pant size you are sewing so see what looks most balanced by eye.

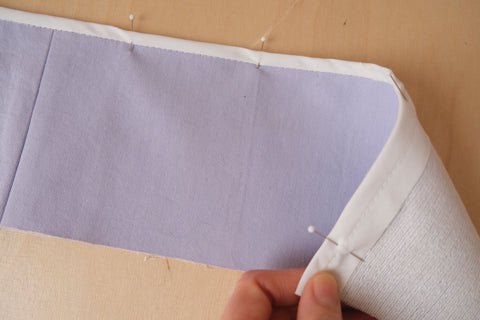
6.b
Pin your waist band in place all around the top of the pant, onto the right side of the garment, right sides together, making sure that your centre fronts are sitting super neat and flush with the CF pant. Pin CF and CB first and then pin the rest so that it fits evenly across this part, you may have to ever so slightly ease your waistband onto your pant. Sew your waistband on with 1cm S/A. Be very careful when sewing over the zip section that you do not accidentally sew over metal. If it's getting a little close hand turn your wheel over this part for a few stitches just to be safe.

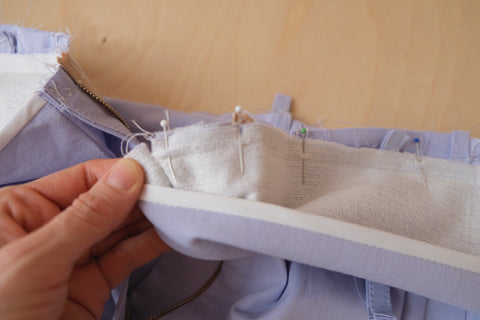

Now press all seams up into the waistband and fold the rest of the band in half and pin your waist band in place so that the side with the binding extends around 1cm or so past the seam. ONLY PIN your left and right waistbands down. Now sew your waist band down by stitching in the ditch, being very careful over the zip part again. You should ONLY sew down your left and right front waistband pieces, and leave your CB waistband open.

Here on the ends you can see that the band is folded under a little on an angle where the binding is, this is so that this part of the waistband sits inside the band and looks neat when finished.


Leave the back waistband un-sewn for now....

6.c
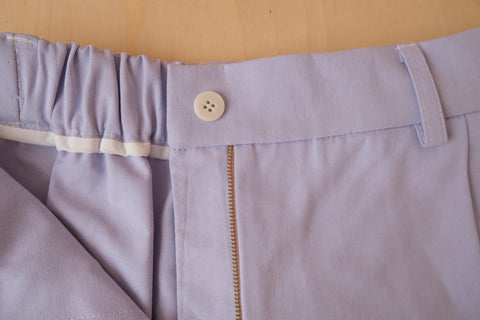
Now take your elastic and slide it into the back waistband , pinning each end in place, with around 1cm of the elastic feeding into the front waistbands sections. Top stitch the elastic down by sewing through all layers and stitching right over the seam that joins the CB waistbands to the front waistbands.


And I'm sorry I didn't get a photo of this actual stitch line finished, but sew in the seam that is pinned in the above photo! Now pin the back waist band in place and stitch in the ditch using a half foot so that that you don't accidentally sew over the elastic. I seem to have missed taking a photo of this actually stitched here as well but if you scroll further down you will see more pics on the finished waistband.

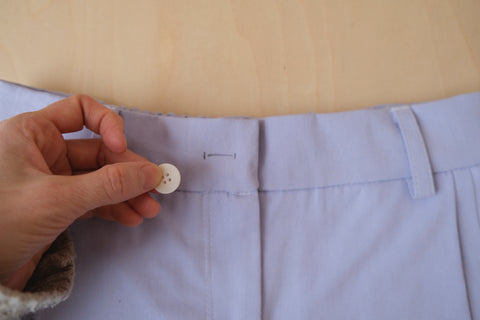
Now turn up your belt loops, turn under 1cm at the top, pin in place and top stitch firmly down. This part can get fairly bulky so take extra care here when sewing. Finally do a button hole on your right waistband, and sew a button on the left. Now you have a finished pant with a fitted waistband and fly front!


I hope you have enjoyed this tutorial! I have tried my best to make sure that all the steps are correct but as this is a particularly involved one please do get in touch (info@birgittahelmersson.com) if you pick up anything that doesn't seem right and I will fix it up ASAP!
Thank you,
Birgitta xx